How to build smart chatbot for your website.
Tutorial about how to build a AI smart chatbot for your website. Building chatbot using the OpenAI assistant API.
Welcome to OpenAssistantGPT, in this guide we will guide you on how to build a smart chatbot for you website. In this tutorial we want to any body without coding skills to be able to create an assistant to your website.
OpenAssistantGPT assistant chatbot is able to learn from any custom content and understand everything about your business. With our custom website integration, your customers will be able to ask any question and receive smart answers.
Before we start this tutorial you'll need two accounts:
- A Google or Github account to connect to OpenAssistantGPT.
- An OpenAI account, with you credit card configured on it.
Small note! If you prefer interactive in-app onboarding you can start with this https://www.openassistantgpt.io/dashboard/onboarding.

Step 1 — Configure your OpenAssistantGPT account
In this step we will configure your account to enable chatbot creation and file uploads.
- Open https://www.openassistantgpt.io/dashboard/settings.
- In a new window open https://platform.openai.com/api-keys and create a new secret key.
- Set this new secret key in your OpenAssistantGPT settings.
Also in the OpenAI platform don't forget to add your credit card or they won't let you generate any messages. Now that your account is configured let's move to Step 2.
Step 2 - Upload your file with custom content
This file contains the content from which your chatbot retrieves information, everytime you will ask something to your chatbot he will look at the file content. It can be various file types such as .docx, .txt, .slx, .csv, etc. You can either create your own file by copying website content or extracting information from a custom source. Ensure that you use publicly available information only for security reasons, as anyone will be able to interact with your chatbot once it's added to your website.

- Open this https://www.openassistantgpt.io/dashboard/files.
- Upload your file that contains your custom content.
Step 3 - Create your first chatbot
Now, let's proceed to create your first chatbot.
- Open this in your browser https://www.openassistantgpt.io/dashboard/new/chatbot
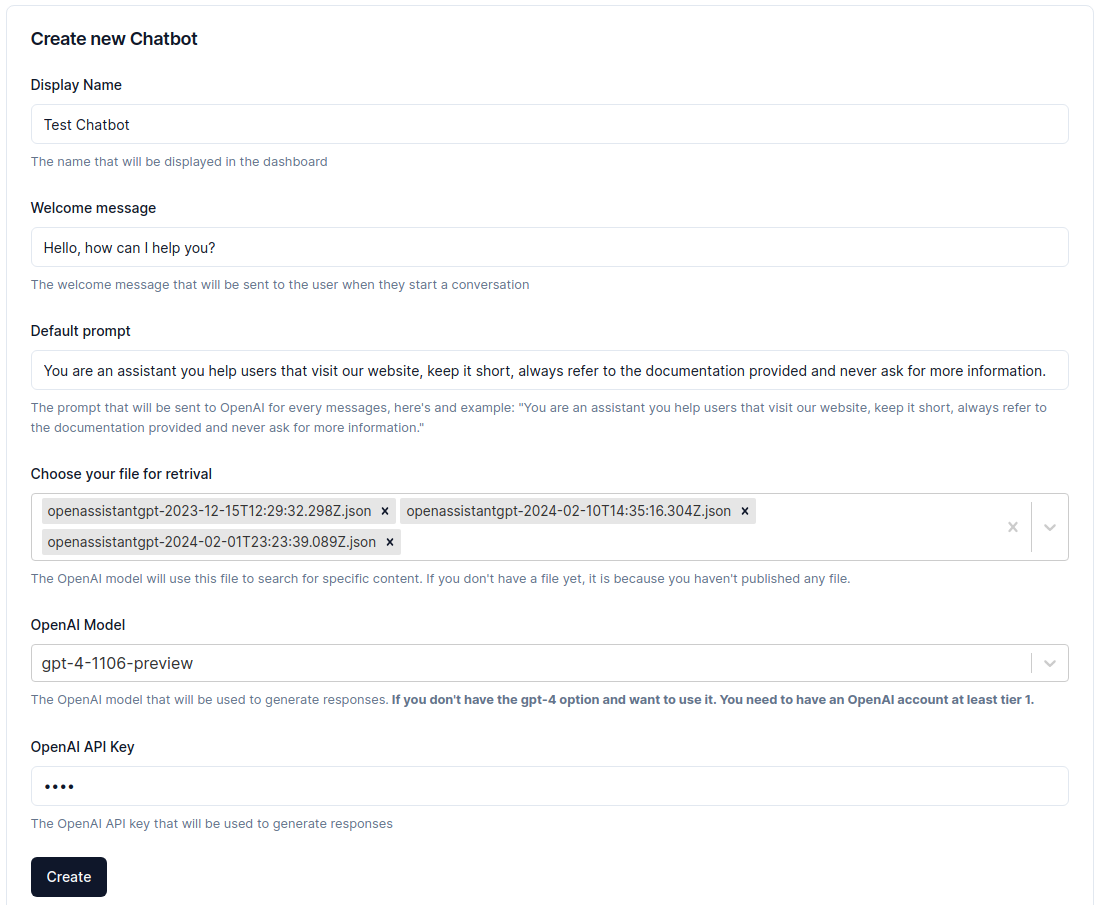
- Fill in the necessary informations by adding the name, welcome message, OpenAI model, files etc.

- Press create!
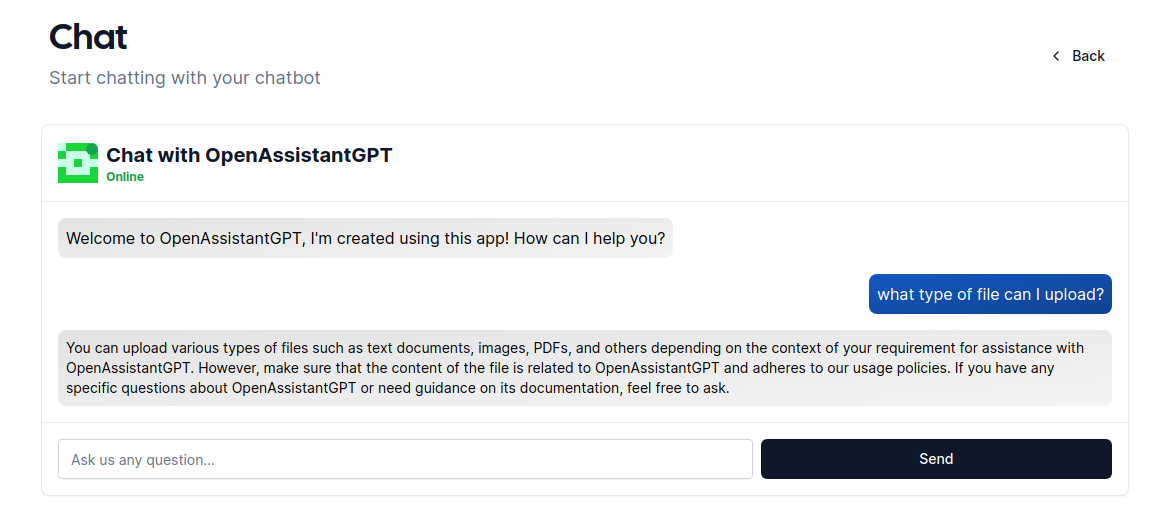
- Now in your chatbot list https://www.openassistantgpt.io/dashboard/chatbots and by using the triple dots on the right of your new chatbot you can choose the option chat to talk with him.

Step 4 - Embed the chatbot in your website
Finally, you can embed the assistant chatbot with few lines of code in your website. You can also find the information on how to embed your chatbot in your chatbot settings.
Finally, after 10–15 minutes you are able to create your own AI Assistant chatbot with custom content and talk with him. Now all customers are able to ask questions about your business and get smart answers.
For more similar guides you can give a look at our Medium post or at our dev.to post.
Related Guides
To further enhance your chatbot implementation, check out these related guides:
- Build a GPT Chatbot for Your Website - Learn the fundamentals of creating your first GPT-powered chatbot.
- Build a Secure AI Assistant - Implement security best practices for your chatbot.
- Build an AI Agent with External API Data - Connect your chatbot to external data sources and APIs.
- How to Use Message Exports Correctly - Export and analyze conversations from your chatbot.
- How to See All Your Chatbot Threads - Monitor and manage your chatbot conversations.